Browser is for browsing the World Wide Web, but it may sometimes give the user a world sized headache by crashing at an unexpected time or crashing down, when you’re in the middle of an important work. Slow browser is no less annoying.
Although it is annoying, but you can tweak your browser to get it back in the previous working state. Reasons behind a slow browser or often crashes could be many—an extension, plugin, browsing data and many others. So, you need to be patient to reach out to the root cause of the issue. Today, we are going to discuss the tweaks of Google Chrome.
Let’s get started with it!
 .
.
Extensions are added to the Chrome browser, and visible in the address bar of Chrome as a button, which can be disabled by right clicking on the button and selecting the option of ‘uninstall’.


About the Company:
Mytechgurus is an independent tech support that provides technical support to users across USA, UK & Australia. My tech gurus have served more than 150,000 plus customers around the world.
Deactivate the plugins
When you install a Chrome browser, plugins get automatically installed in the browser. These plugins make it easier for user to use Chrome for processing different kinds of content, related to—Flash, Java, etc. However, many of the installed plugins are not required and more the number of plugins, slower your browser will become. So, you can disable the unwanted plugins to beef up your system. Here’s how: You need to type ‘about:plugins’ in the Chrome’s address bar. It will list down all the plugins that are installed in your browser. Go ahead and click on ‘disable’ link below the name of the plugin. .
.Disable Extensions
Disable Extensions Certain programs require to be added in the browser, to pull out the maximum functionality out of the Chrome browser. Adding too many extensions in the browser may give adverse effects, which can be taken care of, by disabling few extensions that are not crucial.Extensions are added to the Chrome browser, and visible in the address bar of Chrome as a button, which can be disabled by right clicking on the button and selecting the option of ‘uninstall’.
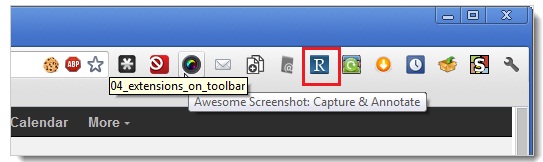
When
the extensions are not visible in the address bar, you need to click on the
wrench icon of the Chrome browser and navigate to the ‘Tools’ option. Select
‘Extensions’ from there. This will give you the list of all the installed
extensions..


Get rid of the browsing data
Browsing
data can be one of the most responsible factors for slowing down your browser.
So, it is better to clear the browser of the browsing data, at a frequent
period. To clean the browsing history after a particular session, you need to
choose the wrench icon and select ‘tools’ from the list of options. Next step
is to choose ‘Clear browsing data’ option.
You
can choose the time frame for the deletion of the data and click on ‘Clear
browsing data’.


Follow
the above tweaks, whenever you’re not satisfied with the performance of your
browser. These tweaks will give you a beefy browser, once again.
About the Company:
Mytechgurus is an independent tech support that provides technical support to users across USA, UK & Australia. My tech gurus have served more than 150,000 plus customers around the world.


